Welcome to my blog!

Digital Cuneiform Blog

Assyriologist in the digital world


In the previous post, we learned how to draw cuneiform signs with Pencil Tool. This time we are going to learn how to do the same with Pen Tool. You may ask, why bother learning another tool when the Pencil Tool is sufficient to do the job, as it was shown in a last post. There are a number of reasons: Pen Tool offers more precision than Pencil Tool, which is especially valuable in drawing cuneiform copies. Also, one needs to have a significant skill to master drawing with Pencil Tool, while Pen Tool  can be operated by anyone: in other words, you do not have to be good with hand drawing to produce perfect drawings with Pen Tool. Pen Tool is especially good for drawing curves and straight lines, exactly what is needed for drawing cuneiform signs, while Pencil Tool is better fitted for any irregular shape. One has to have a steady hand for drawing signs with Pencil Tool, or use more smoothing while any shape drawn with Pen Tool is going to be quite regular and smooth by definition. There are also downsides of using Pen Tool: the main is that Pen Tool is unintuitive because it operates differently than traditional drawing tools on paper, and, therefore, some people consider it complex and difficult. In the end, it all is a matter of preference: whether you draw with Pen Tool or Pencil Tool, but I would like to give you that choice.

Let's us go through some basics at first. Pen Tool makes paths or operates on paths in much more detailed way than Pencil Tool, therefore with a Pen Tool you have to know the underlying structure of paths in Illustrator, so anchor points and handle controls. In fact, with Pen Tool you actually create anchor points and decide about a placement of handles. Often used analogy is that drawing with Pen Tool is like connecting the dots, the problem is that the dots are just in your imagination until you place them with Pen Tool. Let's see how to draw a straight line with a Pen Tool. To create a straight line, select Pen Tool and click somewhere on your artboard: you just created the first dot (anchor point). Let go of the mouse (stylus) and click again to create another point: Pen Tool would automatically connect these points for you, making a straight line. You can click making points endlessly, creating a shape built of straight lines. When you place your Pen Tool close to the first point of the path, the small circle will appear next to the Pen Tool, meaning that you can close the path. Also, when you hold SHIFT key while operating a Pen Tool, the line you place will be placed in 45-degree angle from your starting point. And remember, you can always correct your lines with Direct Selection Tool by manipulating anchor points and handles, as I showed you last time.
Drawing straight line with Pen Tool
Drawing curved lines with Pen Tool is little more complex. When you place your point you have to hold your mouse down (or stylus), and drag it up, down or sideways. You will see that the anchor point you just placed produced handles. Drag further and you will see how it shapes the curvature of the line. When you drag upward, the line curves down, and when you draw downward, the line curves up. Let go of the mouse when you are satisfied with your segment of the line, and place another anchor point in different place, remember to hold your mouse and drag your handles to curve the line. Se video below:

You can modify the drawn lines afterward: when you hover over any of the curved anchor points, and click on it with Option key (on Mac) or Alt key (PC) held down, you will change anchor point to straight one. If this is the last anchor point you drew, and you see the handles, click and drag a handle with your Pen Tool while holding down Option/Alt key, and you will see you can modify the handle and so, the curve. By default, the anchor points made by setting Pen Tool and dragging it in any direction are made smooth, that is, handles are placed symmetrically, so the curves behave similarly on both sides of the anchor point. However, if you modify the handles with Opt/Alt key held down, you create a corner point (known also as cusp node), when handles are not symmetrical (or you get rid of handles completely by clicking on anchor point with Opt/Alt held down).

By now you may realize that Pen Tool can be very helpful with drawing cuneiform which in drawn form is basically built of straight and curved lines. In case of traditional hand drawing or drawing with Pencil Tool in Illustrator, one has to have some artistic skills to draw cuneiform. With Pen Tool, it is enough to have a knowledge of operating it to draw decent copies.

Let's try to draw actual cuneiform. First, we are going to go through the basics by drawing a generic vertical wedge, so later you can use it in practice on the actual copy: 1) First, set up a first anchor point in the place where the base of the wedge is going to be placed (just click and let go, we need a straight line, so no need to drag to produce handles); 2) Next, above it, where there is going to be a base of the wedge head, set up next anchor point, but this time hold mouse/stylus and drag slightly upward to produce handles. 3) Now, we are going to draw a wedge head: set up an anchor point slightly above and to the left to the previous one, and hold mouse/stylus and drag again slightly to the left, and do not let go mouse/stylus yet; 4) This time additionally press and hold Option key (on Mac) or Alt key (PC), and turn your mouse/stylus to the right, suggesting the direction of the top of the wedge head (alternatively, let go your mouse/stylus, and now press and hold Opt/Alt key, your tool changes into Anchor Point Tool; now drag the handle on the left and turn it to the right, and let go Opt/Alt key; now continue drawing with Pen Tool); 5) now, place the third anchor point of the wedge head to the right, repeating the same process: set up anchor point, hold mouse/stylus and drag it more to the right, do not let go the mouse/stylus yet; 6) now press and hold Opt/Alt key, turn the right handle to the left directing it to the first anchor point of the wedge head at its base, let go of the mouse/stylus (alternatively, you can modify the handle with Anchor Point Tool as above); 7) now move your mouse/stylus to the base of the wedge head, press and hold Shift key, set up the anchor point, let go of the Shift key, drag your mouse/stylus downwards to shape the curve accordingly, and let go of the mouse too (if you forget to press Shift key, your tool will change to Add Anchor Point tool or Delete Anchor Point tool, depending if you hover over the line or the anchor point respectively); 8) now, you can press and hold Cmd/Ctrl key to turn your tool to Selection Tool, or just select Selection Tool on the Tools Panel, and click somewhere outside the wedge to see it fully. The following video shows you the whole process:
Few additional tips: at any point you can press Opt/Alt to change to Anchor Point Tool to adjust handles, so your lines are curved exactly as you like it. Also, you can always switch to Direct Selection Tool (A key) to modify placement of your anchor points. Finally, if you abort the process at any point, you can continue drawing your path with Pen Tool by hovering over the last anchor point, clicking on it with Pen Tool selected, and dragging: Illustrator then places the handle in the direction of your drag, and allows you to continue drawing a path as soon as you let go, i.e., you can now place new anchor points to continue the path. As usually, you can move around your artboard at anytime by pressing and holding a spacebar, and dragging your mouse/stylus. Use also zoom in/out (Cmd/Ctrl +/- when you need): I personally prefer with very close up view.

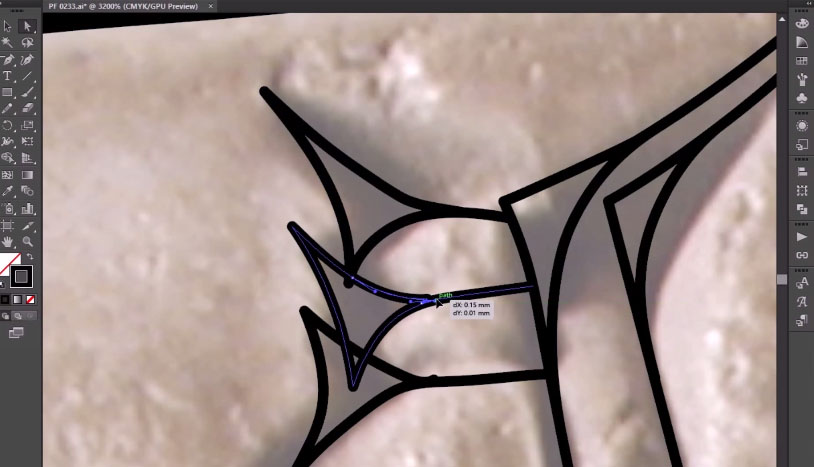
All right, now we can draw the actual cuneiform sign on our copy. Once again, we will start with our first sign of the tablet, "50," this time drawing that with Pen Tool. The process is very similar to the one described above, but repeated several times for each of the wedges. When you are done, you can correct your drawing with Direct Selection Tool, but usually drawing with Pen Tool does not require many corrections: Pen Tool can be operated very precisely. See the following video:
Afterwords, you can join signs using Pathfinder or Shape Builder Tool, as it was explained in the previous post.

So now you should have an idea how to draw cuneiform signs with a Pen Tool. I suppose, it would require some additional training until you are comfortable with a Pen Tool, but at least this gives you yet another tool at your disposal. This concludes this part of the tutorial. Next time we are going to go through some additional tools for editing and perfecting your paths.

In the next posts I'll go through some ways you can draw cuneiform signs on your copy. There are two main tools we are going to use: Pencil Tool, and Pen Tool. Pencil Tool was explained in the previous post. Therefore, starting drawing a sign should not be difficult, if you are familiar with Pencil Tool already. Remember to make a new Layer for your signs, call it, e.g., "Cuneiform," and lock all other layers. And you can start drawing.

Few tips before you actually start: when you are done with a given line, switch to Selection Tool and deselect this line by clicking somewhere outside it. In this way, you are not going to edit this line anymore. The easiest way of doing it is to use CMD/CTRL key: when you have Pencil Tool selected (or any other tool for that matter), holding CMD/CTRL key switches to last selected tool as long as you hold the key. So if you used Selection Tool before (or Direct Selection Tool), you can use it to deselect the stroke you've just drawn. Remember, if you have the line selected you can still correct it with Pencil Tool, so you can perfect the sign as long as you need. To go back to the previous operation, i.e., to undo any mistake you might have just made, just press CMD/CTRL + Z, or Edit/Undo Pencil (or the like). This video shows you how it may proceed (drawing of "50" sign at the beginning of the tablet):
Now, depending on your skills, the drawing can have some problems in details. The best way to correct those minute details is to use Direct Selection Tool . To use Direct Selection Tool you have to have a basic understanding of paths and editing anchor points in Illustrator. 

Let's go through some basics, the rest you can read under the link above. So all vector artwork is composed of paths (strokes or lines), which, in turn, have so-called anchor points. Usually, people compare paths to a skeleton, and anchor points to joints. When you select a path with a Direct Selection Tool, you will see anchor points. When you select an anchor point, you will see its handles: handles control the curvature of the path, try to select and drag a handle, and you will see what I mean by that. Essentially, when you move handle closer to the anchor point, you shrink the curve, and when you move handle further from the anchor point, you make the curve larger. You can also remove excessive anchor points using Delete Anchor Point tool  ("-" on the keyboard). The general rule is that there should be no more than one anchor point per arc of the curve, 

By manipulating paths with Direct Selection Tool and Delete Anchor Point tool, we are going to eliminate the problems with our sign drawing. See this video:

In result, you should have much smoother drawing of the sign, look at this comparison:

Yet another thing one might do is to combine horizontal wedges of "50" sign. This is only matter of taste, so you can skip this step. In order to combine wedges (or any other objects), we may use Pathfinder Panel (Window/Pathfinder): select two (or more) wedges with Selection Tool, and click on first icon of the Pathfinder panel (Unite), the result should be similar to that:

Depending on the version of Illustrator, you may use Shape Builder Tool  to get the same results in combining wedges (see also here and here). This tool was introduced in Illustrator CC. Because of that, I am not going to deliberate on this tool, but you can learn it yourself. According to Adobe, it is supposed to be easier to use than Pathfinder, however, I find both equally easy, so it is up to you to decide.

This ends third part of our tutorial. In the next post, I will explain how to use Pen Tool to draw cuneiform signs.

In this post, I am going to explain how to use Pencil Tool (accessible by pressing N) to draw the contour of a tablet. I assume that you have a command of basic concepts of Illustrator, but if not, see this tutorial for understanding what are paths in Illustrator, and how to work with them. I am going to focus on paths and editing paths in a later post as well, so you might be able to follow the tutorial without this knowledge.

Before we are going to elaborate on Pencil Tool, you should know that the Pencil Tool, as any other tool fitting to hand drawing in Illustrator (e.g., Paintbrush Tool, which we are not going to cover in this tutorial), best operates with digital stylus (pen), and requires some skill to master (essentially, you have to learn to hand draw on computer, which is different than on paper). There is a number of solutions on the market for digital styli, including computers which are equipped with those (e.g., Microsoft Surface). However, the most affordable solution is to purchase a graphic tablet (pen tablet), which can be as low as $80. I recommend Wacom brand of pen tablets, the most reliable brand on the market, which works very well with Illustrator and other graphic software on the market.

Pencil Tool is the best fitting for hand drawing, and Illustrator makes it particularly convenient. In fact, operating Pencil Tool is pretty intuitive and should be easy enough for anybody used to actual drawing. Features of Pencil Tool in Illustrator differentiate it from other vector graphics software. Let's see the options of the Pencil Tool (double click on Pencil Tool on Tools Panel to access them):
The Fidelity is the option which regulates the smoothing of the drawing: if you intend drawing regular, smooth strokes, you should use higher setting of the Fidelity. If you want to draw more irregular, nuanced strokes, then you should use lower setting of Fidelity, and lower setting is the most desirable in our case because the tablet has an irregular shape.

Two crucial settings you should leave checked are "Keep selected" and "Edit selected paths." Keep selected makes all drawn strokes automatically selected. Edit selected paths allows for correcting and redrawing the drawn stroke, as long it is selected (so it works perfectly with "Keep selected" option). This is one of the most convenient ways of drawing in Illustrator, which makes it perhaps the best tool for hand drawing on the market.

Now, we should prepare our drawing. Check that you have Photograph on locked layer, and you have a new layer (called, e.g., "Contour") on top of it. Then you can dim the layer with the photograph if you prefer: just double click on icon of the layer with the photograph on Layers panel, select "Dim Images to: 50%" (change percentage if you like), and click OK. Now the photograph is dimmed and drawing on it should be clearer.

Now we should check the properties of the stroke we are going to use for drawing. To access that you have to open Stroke panel (Window/Stroke). To read more about Stroke in Illustrator see here. In this tutorial, we are going to focus on some basic qualities of the stroke.

First, Weight, which is set up in points. For our purposes, we are going to use weight 0.5 pt, although the contour itself might be drawn with bigger weight, like 1 pt or the like. Later, you can edit weights of your strokes, so no worries, we can change it depending on the situation. You should also change caps and joints (corners) of the line: to better emulate traditional hand drawing they should be round (second option in "Cap:" and "Corner:" row). To see the difference, you may draw few lines and change their caps, corners, and weight. The change would be valid only for selected lines.

With everything set up, we can start drawing. Select Pencil Tool (N), be sure that Stroke's Weight is set as it should be, and start drawing following the contour of the tablet, as on the video below:
To move around use a spacebar, which changes the tool to Hand Tool, so you can move to different parts of the drawing (just press and hold a spacebar, click and drag your drawing with a mouse/stylus to the desired place and let go of the mouse and spacebar). To zoom in and out use Zoom Tool (Z) or keyboard combination Cmd/Ctrl +/- to zoom in/out. When you are done, remember to close the path, hold down Option or Alt key, and the Pencil Tool would show small circle to indicate that you can draw the closed path. Then release Option/Alt key. The result should look like that:

Remember to draw closed and joined paths: common mistake people do is making a contour of several unjoined segments. If you draw a contour composed of independent segments, any operation on the contour would be difficult because you will have to select each segment. To prevent that, make sure you use "Edit selected paths" option: when you stop drawing to move to another place of your artboard, resume drawing from some place already drawn, so Illustrator continues the existing path and is not drawing a new path. Look once again at the video, which shows exactly that: the path is resumed and corrected several times, but it is still one object.
This concludes this part of the tutorial. In the next part, we are going to learn how to draw wedges.

In this tutorial, divided into several parts, I am going to describe how to draw cuneiform copies. The final result would look like that:
Tablet PF 0233: copy side by side with photograph
This is obviously copy shown side by side with source photograph used for a drawing. This is Achaemenid Elamite tablet from the Persepolis Fortification Archive (PF 0233 of Category L), so it features Achaemenid Elamite cuneiform, but the way how it was drawn can be applied to drawing copies of any cuneiform tablets. The photograph itself is available at CDLI site here. The transliteration of the tablet was published by Richard T. Hallock back in 1969, and it is available for download for free here. So if you want to follow the tutorial drawing the same tablet, you can. You can obviously use your own photographs of tablets you are interested in, and techniques I am using can be applied to your own work too.

A word on what tools I was using to draw this copy. I was drawing in Adobe Illustrator, so the result is a vector drawing. Some people prefer using Photoshop or other raster graphics editors to draw copies, but vector graphics have many advantages over bitmap/raster drawings, and are particularly useful for hand-drawn cuneiform copies. The main advantage is that the resulting drawing is perfectly scalable without losing any of the quality, namely, without pixelization typical for raster graphics. Also, publishers prefer graphics in vector formats because of the same reason.

Besides Adobe Illustrator, one can use any other vector graphics software, like CorelDraw, free Inkscape, and others. However, I consider Illustrator particularly good for hand drawing. Illustrator tools are built for, well, illustrators, and their work is comparable to work of a person drawing a copy of a cuneiform text. I'll go over these tools in the following posts.

Illustrator has also this advantage that it is pretty well-known program and there is lot of tutorials online about it. You can start with Adobe's own Illustrator help, but any search for Illustrator tutorials or help on particular tools would result with many useful links. If you want invest in learning Illustrator, I recommend Lynda.com
I am not going to spend time on describing Illustrator's workspace, but you can find very good help here. We start with preparing an artboard for drawing a copy. Just make a new file with File/New, and you will see a dialog box showing you different options. Most of them are not important for us, let's focus on "Size": in most cases you may want leave "Letter" or "A4" depending if you work in U.S. or in Europe. If you draw a tablet for a publication, though, you might change size to the page size of your publication. For now, the best option is to follow the page size of the printer you have available: it helps to print the results of your drawing from time to time, so you should set up the paper format used by your printer (so Letter or A4). We are going to work with different zoom levels, which might be confusing at times, so printout gives you the best approximation how the drawing would look like in publication.

First, you should place the photograph of the tablet on the artboard (page) of the drawing, like this:
There are different ways of doing it: you can just drag the photo from Explorer/Finder into Illustrator window, or by using command File/Place. When you are done with it, you will notice that when the photograph is selected (i.e., click on it with Selection tool , first tool in the Illustrator Tools Panel (toolbox), also accessible after typing V on keyboard), it shows envelope-like selection. It means that the photograph is linked, and not embedded in the artwork. When you move your Illustrator file to the different folder, the link will break, while embedded photo will be still present in the artwork (see here). You may, then, embed the photograph, clicking on the button at the top of the screen which says "Embed." Embedding the photograph, though, makes the size of the file much larger.

From the start you should follow the set scale in your drawing, that is, you should decide how the dimensions of your tablet are scaled on printout/finished drawing. Often people follow 1:1.5 scale (1 cm on tablet = 1.5 cm on printout), here we follow 1:2 scale (1 cm of the tablet = 2 cm on printout). To make your drawing follow the set scale, you have to scale up (or down) your source photograph. In order to that, you have to measure how big is centimeter on your photograph with Measure Tool :

You will see the result on Info Panel. In our case, 1 cm of the tablet equals 25.973 mm. To scale the photograph to 1:2 scale you have to calculate how much you have to scale down the picture (what percentage). This is simple equation 20 mm x 100 / 25.973 mm = 77.003041%. Now, select the photograph with Selection Tool, and go to Object/Transform/Scale menu. Insert the result in the Scale: Uniform box, and click OK:
Now your photograph should follow 1:2 scale. You can check it with Measure Tool, to be sure.

Now it is a good time to make yourself familiar with a concept of Layers in Illustrator. We are going to place each part of the drawing on a separate Layer. On Layers Panel (Window/Layers) you see that photograph is on Layer 1 right now, but to make everything clear we are going to rename it "Photograph" or the like. Now you should lock this layer (by clicking on the second column next to our selected layer) to prevent moving photograph, and make a new layer, named e.g., "Contour," where we are going to draw the contour of our tablet, which I am going to explain in the next post.
This closes the first part of our tutorial. In the next part we are going to focus on Pencil Tool and hand drawing in Illustrator.

The "Digital Cuneiform" blog is the place where I write about experiences of Assyriologist, or scholar of Ancient Near East, in the digital world. This includes tutorials and hints on using different tools helpful in related scholarly work, but also opinions and remarks connected with anything related to scholarly work on the ANE with connection to digital tools. At the same time, I invite readers to participate in the discussion, propose suggestions or alternative solutions, etc. The aim of the blog is an exchange of experiences which could enrich and improve scholarly work of anybody interested in the ANE.