In the next posts I'll go through some ways you can draw cuneiform signs on your copy. There are two main tools we are going to use: Pencil Tool, and Pen Tool. Pencil Tool was explained in the previous post. Therefore, starting drawing a sign should not be difficult, if you are familiar with Pencil Tool already. Remember to make a new Layer for your signs, call it, e.g., "Cuneiform," and lock all other layers. And you can start drawing.
Few tips before you actually start: when you are done with a given line, switch to Selection Tool and deselect this line by clicking somewhere outside it. In this way, you are not going to edit this line anymore. The easiest way of doing it is to use CMD/CTRL key: when you have Pencil Tool selected (or any other tool for that matter), holding CMD/CTRL key switches to last selected tool as long as you hold the key. So if you used Selection Tool before (or Direct Selection Tool), you can use it to deselect the stroke you've just drawn. Remember, if you have the line selected you can still correct it with Pencil Tool, so you can perfect the sign as long as you need. To go back to the previous operation, i.e., to undo any mistake you might have just made, just press CMD/CTRL + Z, or Edit/Undo Pencil (or the like). This video shows you how it may proceed (drawing of "50" sign at the beginning of the tablet):
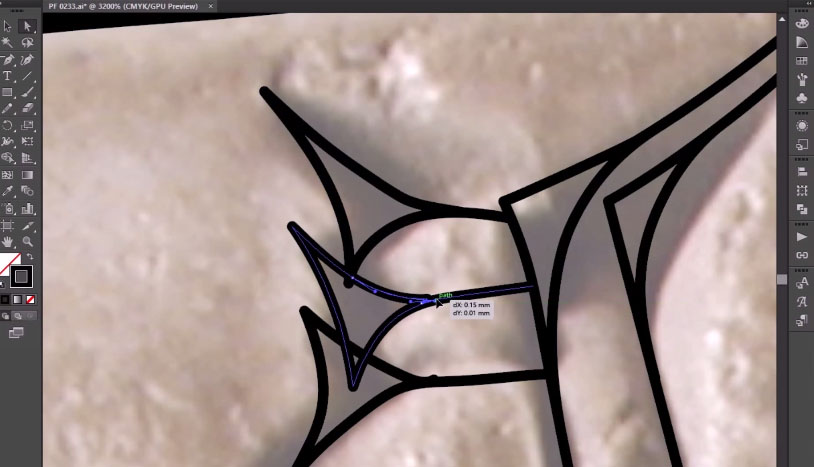
Now, depending on your skills, the drawing can have some problems in details. The best way to correct those minute details is to use Direct Selection Tool  . To use Direct Selection Tool you have to have a basic understanding of paths and editing anchor points in Illustrator.
. To use Direct Selection Tool you have to have a basic understanding of paths and editing anchor points in Illustrator.
Let's go through some basics, the rest you can read under the link above. So all vector artwork is composed of paths (strokes or lines), which, in turn, have so-called anchor points. Usually, people compare paths to a skeleton, and anchor points to joints. When you select a path with a Direct Selection Tool, you will see anchor points. When you select an anchor point, you will see its handles: handles control the curvature of the path, try to select and drag a handle, and you will see what I mean by that. Essentially, when you move handle closer to the anchor point, you shrink the curve, and when you move handle further from the anchor point, you make the curve larger. You can also remove excessive anchor points using Delete Anchor Point tool  ("-" on the keyboard). The general rule is that there should be no more than one anchor point per arc of the curve,
("-" on the keyboard). The general rule is that there should be no more than one anchor point per arc of the curve,
By manipulating paths with Direct Selection Tool and Delete Anchor Point tool, we are going to eliminate the problems with our sign drawing. See this video:
In result, you should have much smoother drawing of the sign, look at this comparison:

Yet another thing one might do is to combine horizontal wedges of "50" sign. This is only matter of taste, so you can skip this step. In order to combine wedges (or any other objects), we may use Pathfinder Panel (Window/Pathfinder): select two (or more) wedges with Selection Tool, and click on first icon of the Pathfinder panel (Unite), the result should be similar to that:

Depending on the version of Illustrator, you may use Shape Builder Tool  to get the same results in combining wedges (see also here and here). This tool was introduced in Illustrator CC. Because of that, I am not going to deliberate on this tool, but you can learn it yourself. According to Adobe, it is supposed to be easier to use than Pathfinder, however, I find both equally easy, so it is up to you to decide.
to get the same results in combining wedges (see also here and here). This tool was introduced in Illustrator CC. Because of that, I am not going to deliberate on this tool, but you can learn it yourself. According to Adobe, it is supposed to be easier to use than Pathfinder, however, I find both equally easy, so it is up to you to decide.
This ends third part of our tutorial. In the next post, I will explain how to use Pen Tool to draw cuneiform signs.


